Today we are puttin’ up Swedish Glögg, a wine based drink that will take the chill off of even the coldest night of the coldest winter. It will warm you, and you will sleep well afterwards. This is a drink that should be shared with friends, family, or people who you just want to warm up with.
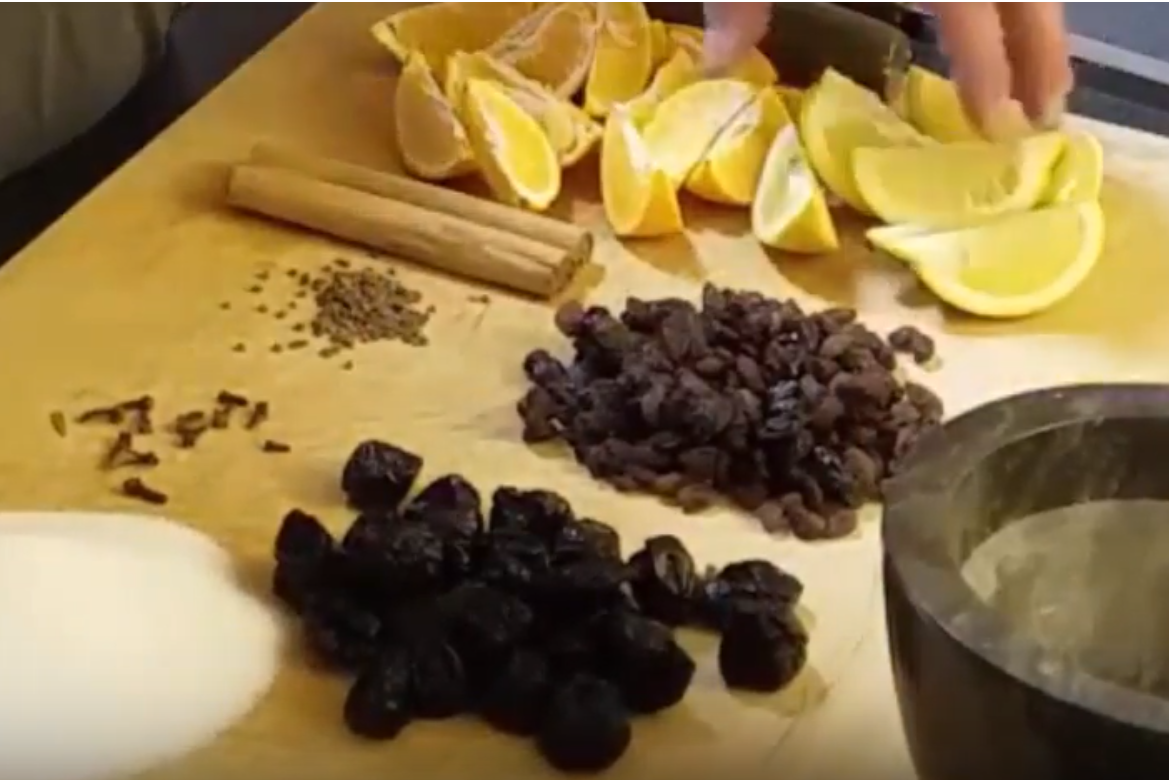
This is approximately the recipe that my wife’s grandfather used to make, and this post is in honor of Poppy. I make it every year and it has in the process become part of my winter tradition. One of the things about making something like Glögg is that each person ends up making the recipe their own, adding those little touches of their own that make it your recipe. In that spirit, I will list the ingredients needed to make a basic batch, but not the measurements because frankly I don’t measure the ingredients myself.
The video below demonstrates what you need to get it started and how to heat it the first day. It is a multiple day process because the ingredients need to sit in the wine for a while after it has been brought up to temperature to let them a chance to really share and merge their flavors. The ingredients are listed below the video.
Swedish Glögg Recipe (Glogg)
Ingredients by Volume
Dark Red Wine – 1 gallon. I prefer a Burgundy
Port – 1 bottle
Citric fruit – oranges, lemons cut in wedges
Sugar
Prunes
Raisens
Almonds, crushed
Cinnamon sticks
Cloves
Cardamom
Your Secret ingredients or spices
Directions Day 1
Pour wine into a large pot
Add Sugar, fruit, spices
Bring up to hot, but not boiling (About 170 – 180 degrees F – The video shows how to tell when it is the right temperature)
Let sit at least one day
Watch this video to see how to do the rest of the recipe
Directions Day 2
Add Port, bring back up to temperature and let it sit.
Remove Fruit
Strain to remove spice material and clarify the Glögg
(optional) Add fortifying alcohol such as rum, vodka, spiced rum, moonshine, or whatever you like
You can serve it cold or hot, but I am not sure why anyone would drink it anything but hot. Same temperature as preparing it, do not boil and about 170 degrees is ideal.
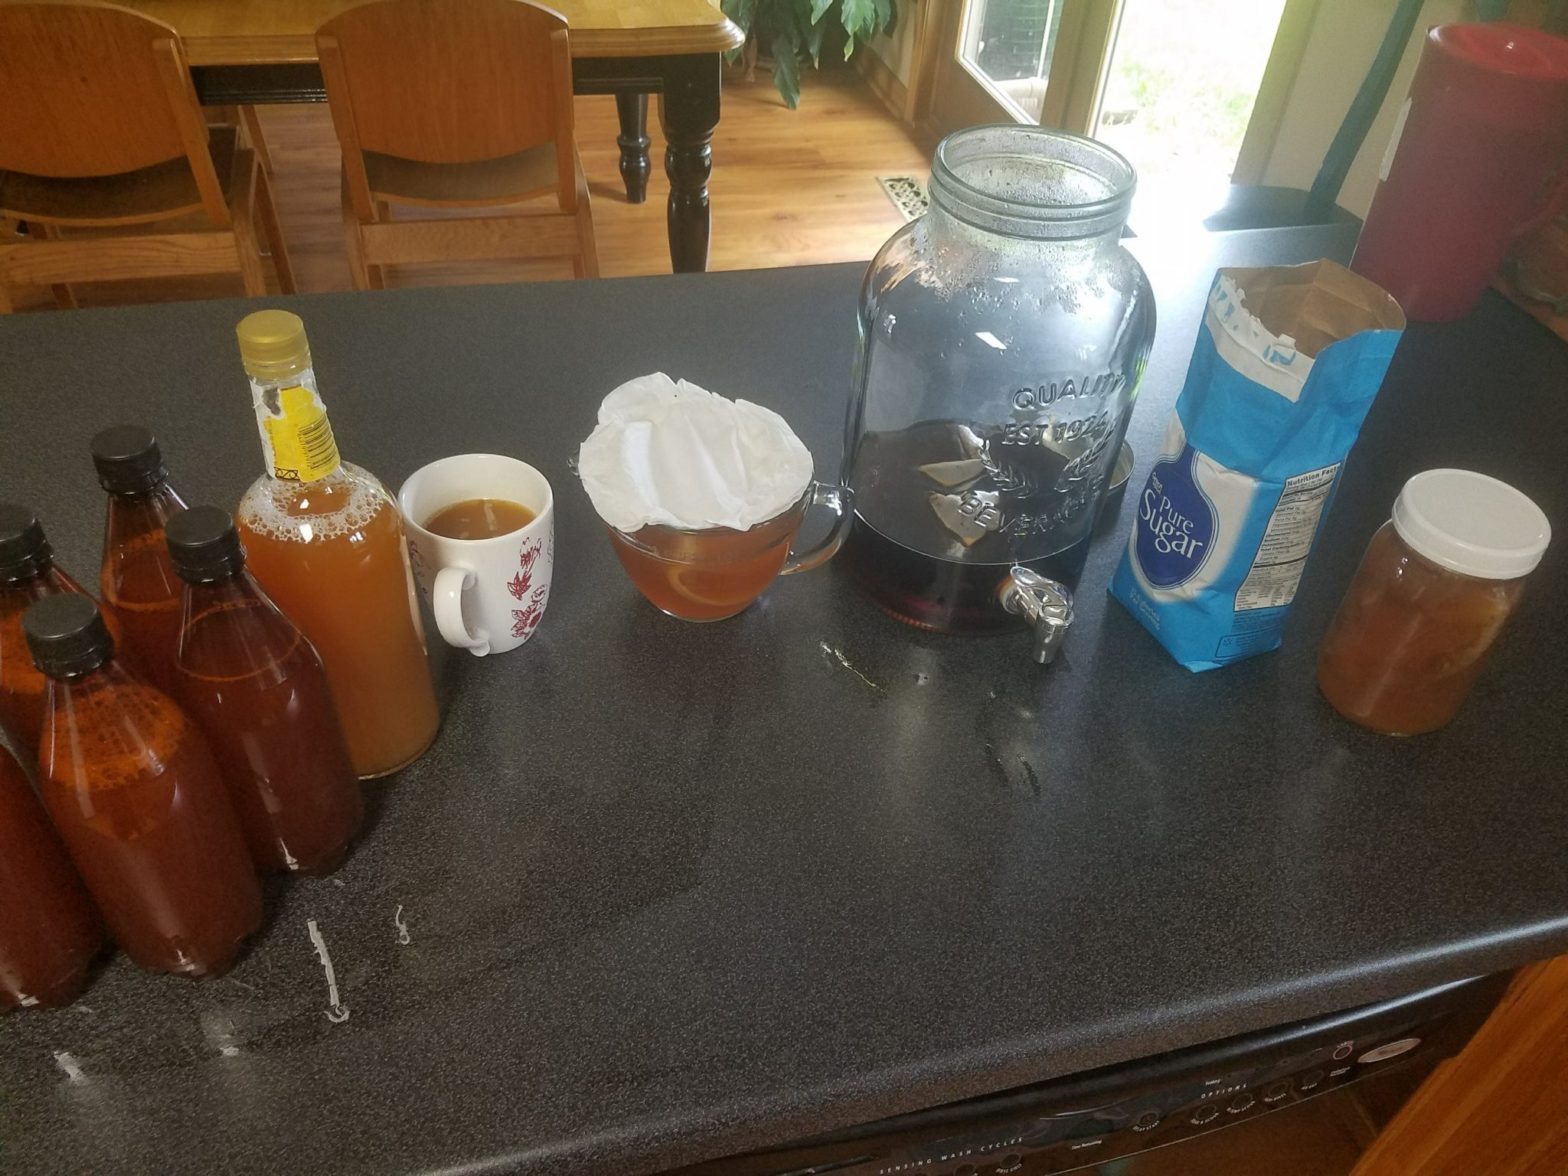
So you were thinking about making your own Kombucha. The good news is that it really isn’t that hard once you know what you are doing. All you need is a couple of cups of Kombucha, a SCOBY (Symbiotic Culture of Bacteria and Yeast), tea, sugar, a glass jar to brew it in and something to put it in when you are done brewing it and waiting to drink it.
In the video below, Doc T shows you how easy it is. He also goes into bottling and flavoring the Kombucha after it is brewed.
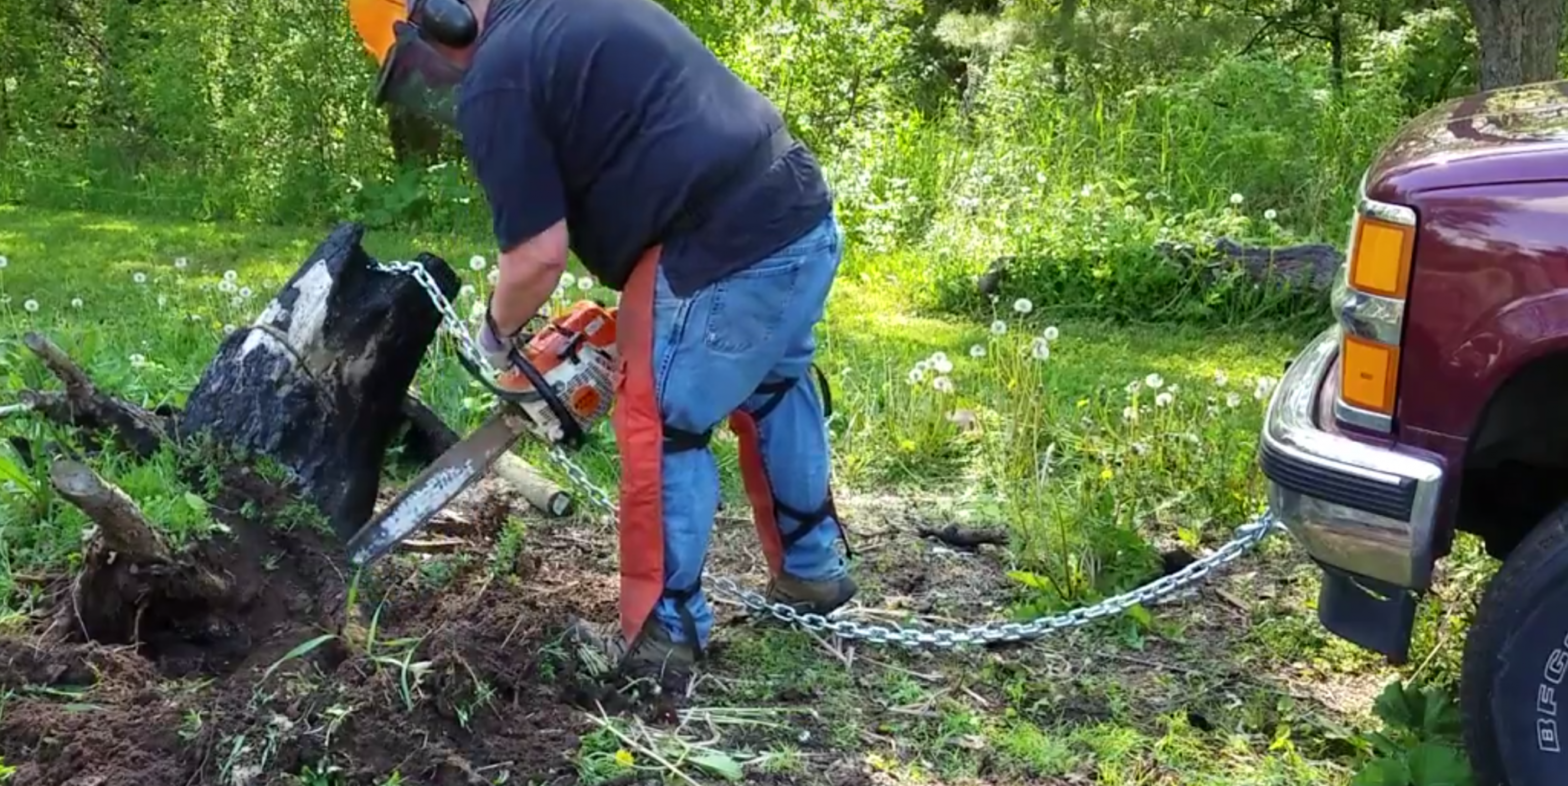
When a tree comes down, it usually leaves behind a stump. These can be formidable foes. In this video we see how Doc T. took on a stump from a large pine tree that had blown over. Initial hopes for an easy solution did not pan out. The video below shows the battle that ensued using truck, chain, chainsaw, shovel, man and dog.
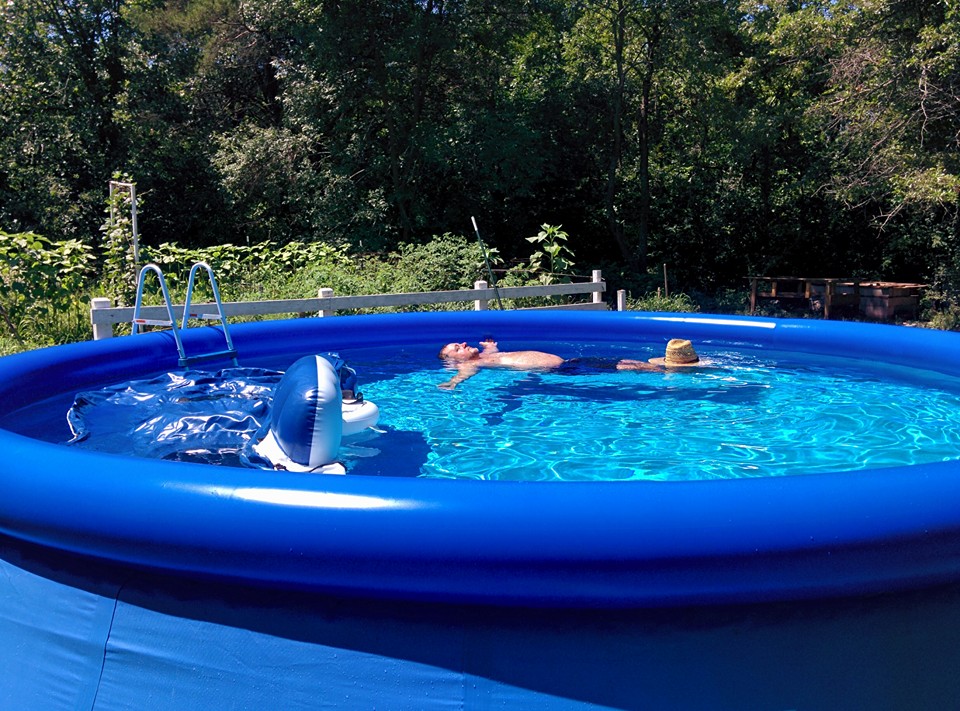
You know the drill. It is summer, it is hot. Wouldn’t it be nice if we had a pool in the back yard.
Yes, yes it would.
Ah, floating in the pool
The easiest path to having a pool in the back yard is to buy one of the large inflatables that come with a pump for circulating the water. We did that last summer when the temperature hit 90 degrees and we happened to see one on sale at one of those bargain stores. We got a 18 foot pool that is 4 foot deep for about one fifth of the cost it normally goes for in stores. We set it up and had a few swims, then we drained it and packed it away.
This spring came along, and it was time to set it back up. No worries. We had all the parts, we had dried it and coated it with talcum powder so the pool wouldn’t stick to itself. It was ready to be put up. Since I now have this channel, I thought it would be a good time to share some of the things I did to overcome the few problems we encountered.
With these inflatable pools, there is a very large air bladder at the top that needs to be filled. That takes a little ingenuity, but that is what we are good at here at Puttin’ Up with Doc T. In this first video, we go over the filling of the air bladder.
In the second video, we show what happens when you are just a little bit short of having enough hose to have it reach the pool.
Sometimes you meet somebody, and you just know that someday they are going to end up involved in something pretty cool. When I met Dave Brown in around 2006, I knew that where ever his path took him, it was going to be interesting. I was right.
Dave brown doesn’t let the opportunity to enjoy life pass him by.
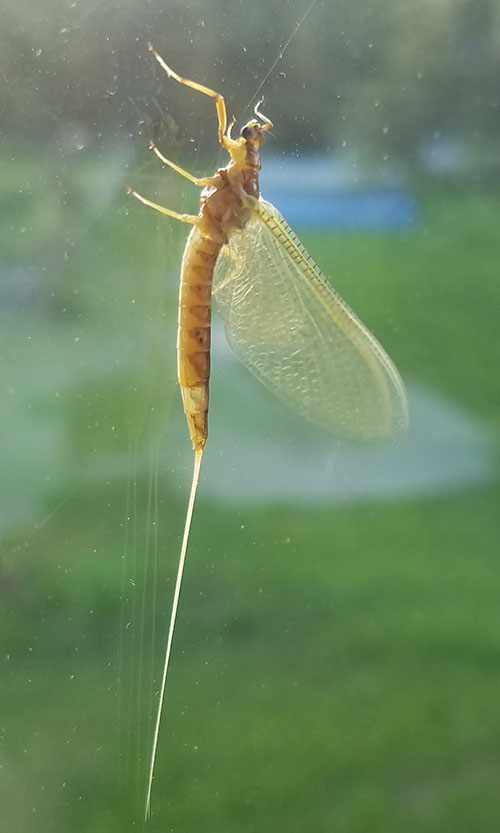
Let me start with this thought, eating a bug, the right bug, is no big deal.
If you haven’t looked yet, take a look, there are many articles that talk about insects being one of the foods of the future. Humans have been eating bugs intentionally and unintentionally for as long as there have been humans. But we have developed an irrational aversion to intentionally eating them. But taking a lesson from Timon and Pumba, bugs can be a nutritious, and yes tasty component of our diets.
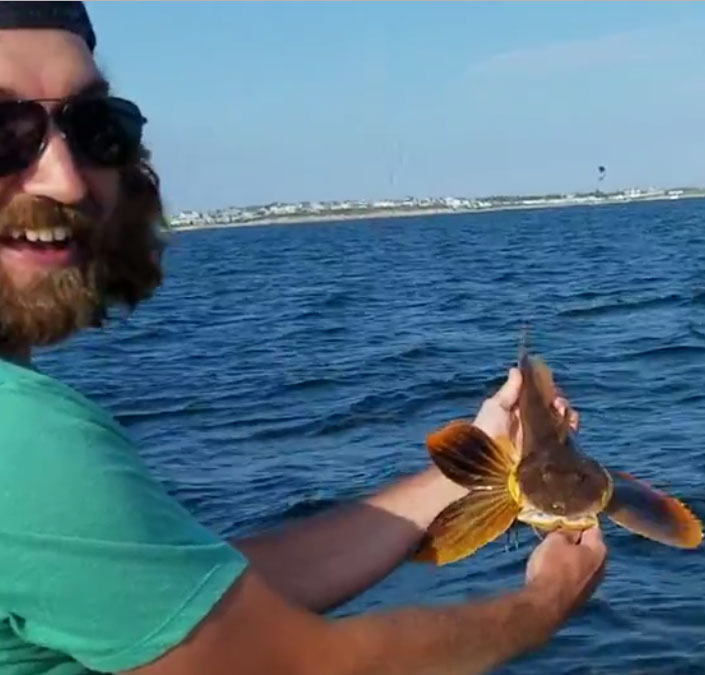
Go to YouTube and look for people eating mayflies, and you will get a couple of videos with people screaming about the act of eating a simple mayfly. We have all heard of chocolate covered this or that insect. But we cannot depend upon chocolate to be served covering all of our protein. So I just wanted to set the record straight, mayflies are tasty little creatures that are packed full of protein, and they are easy to eat.
Go ahead, give it a try. You may find you like it, you may find you don’t. But I believe that you will find that it is not a big deal.
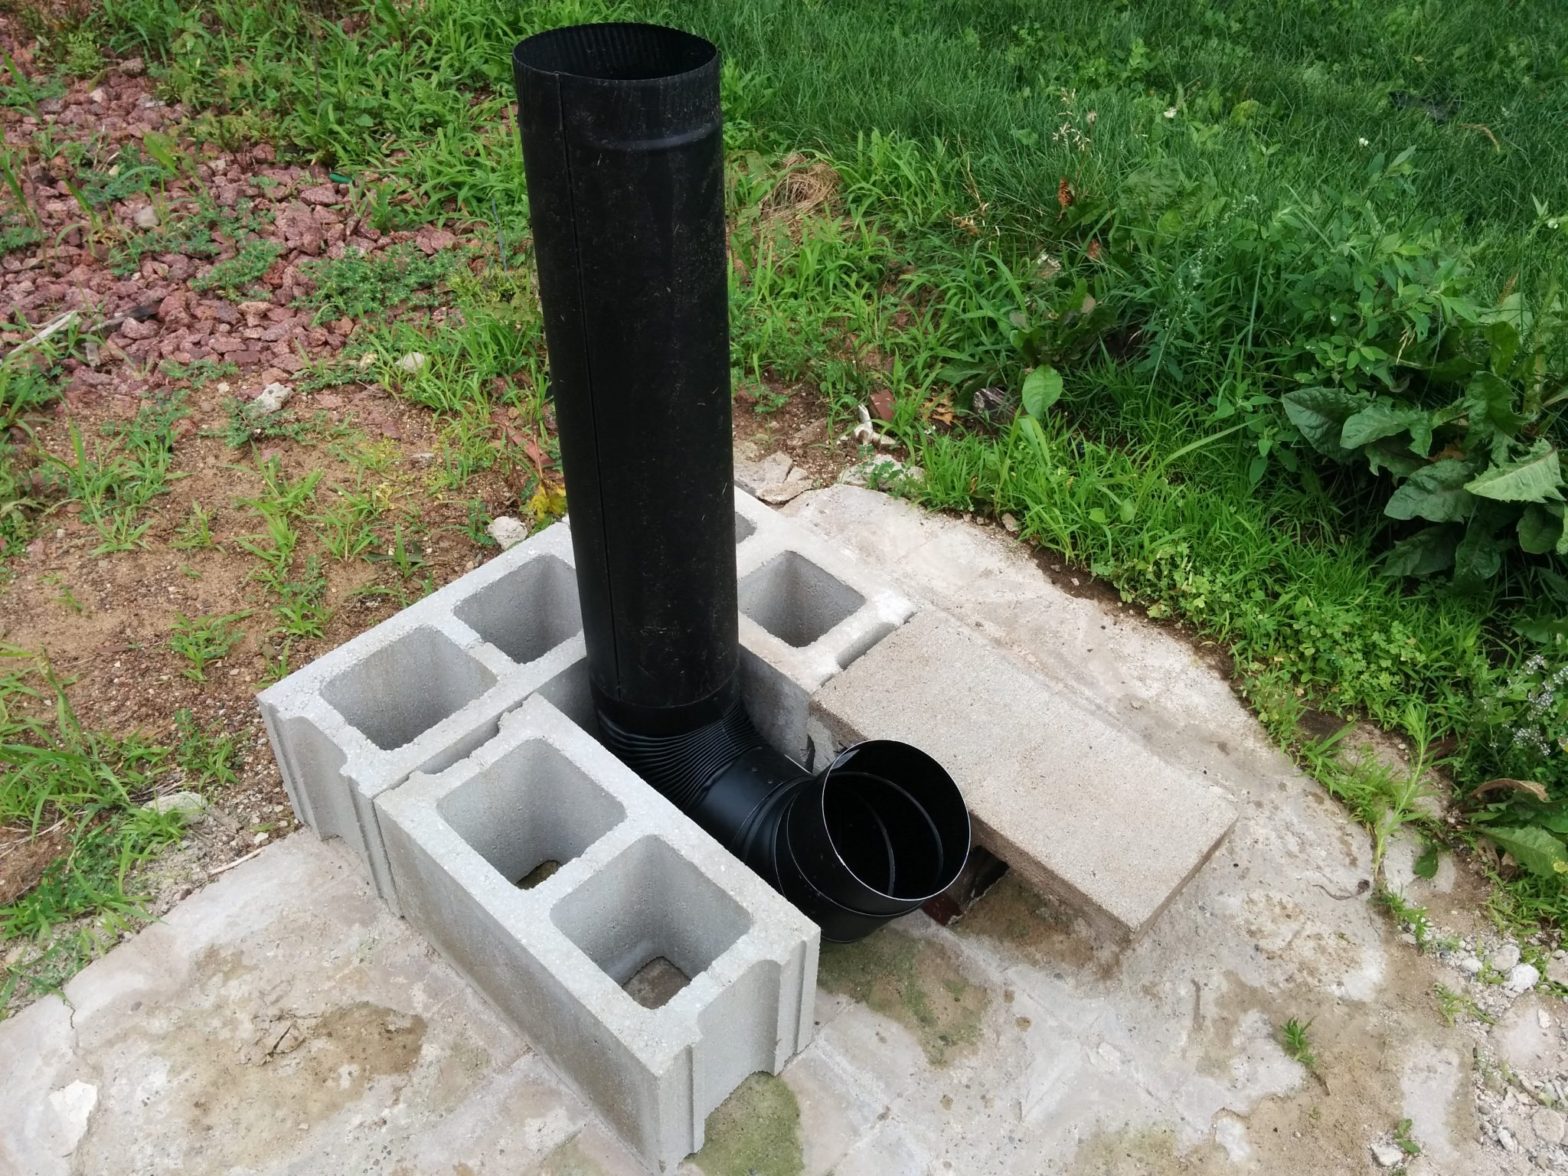
The rocket stove in it’s purest form, is simply a high temperature combustion chamber and chimney through which a lot of air and a little fuel burn in an efficient manner. The stove itself is this combustion chamber. What you decide to do with the heat after it comes out of the chimney is extremely flexible and it depends upon how you direct and purpose the heat produced in the combustion chamber.
In the image below, you can see the rocket stove portion of my project. I have made mine using two 6″ diameter stove pipe elbows to create the combustion chamber, and then an additional section of stove pipe for the chimney.
Two elbows and a section of 6″ stove pipe make up the heart of the stove rocket stove.
Now, let me step back a bit and explain why I am doing this because frankly I spent quite a bit of time learning about rocket stoves. The easiest way is probably to view this video.
So through the spring and summer of 2015, I learned about and tested the concepts of the rocket stove. I wrote about the Four brick rocket stove, and I wrote about “The importance of the Chimney in the Rocket Stove. After those experiments I moved forward with the chimney, experimenting to come up with the combustion chamber and chimney shown in the first image above. As you saw from the video, my motivation is to build a new BBQ grill. But if you know me, you know the straight and simple path is never the one I take.
My first thought is that if I just slap a grill on top of the chimney, it is going to be so hot that I just scorch anything that I put on that grill. Take it from me, it gets really hot on top of that chimney. So, my next thought was that I wanted to honor the meat I was cooking, so I would divert the heat so that it wasn’t just scorched meat, but something you would enjoy eating.
The cool thing about this rocket stove stuff, is that after the heat comes out of the chimney, it has to go somewhere. It can go up, or it can go down, sideways or just about anywhere you direct it, but it has to go somewhere. The whole idea of the rocket stove is that there needs to be a lot of hot air moving through the system. That means that you can get creative, and that is what I did. In fact, every time I go out to use the grill, I end up coming up with a new configuration for my grill based upon what I am trying to do. But that is another post.
So in the next video I give you an idea of what I have done as I fire up the indirect heat layout of my rocket stove grill for the first time.
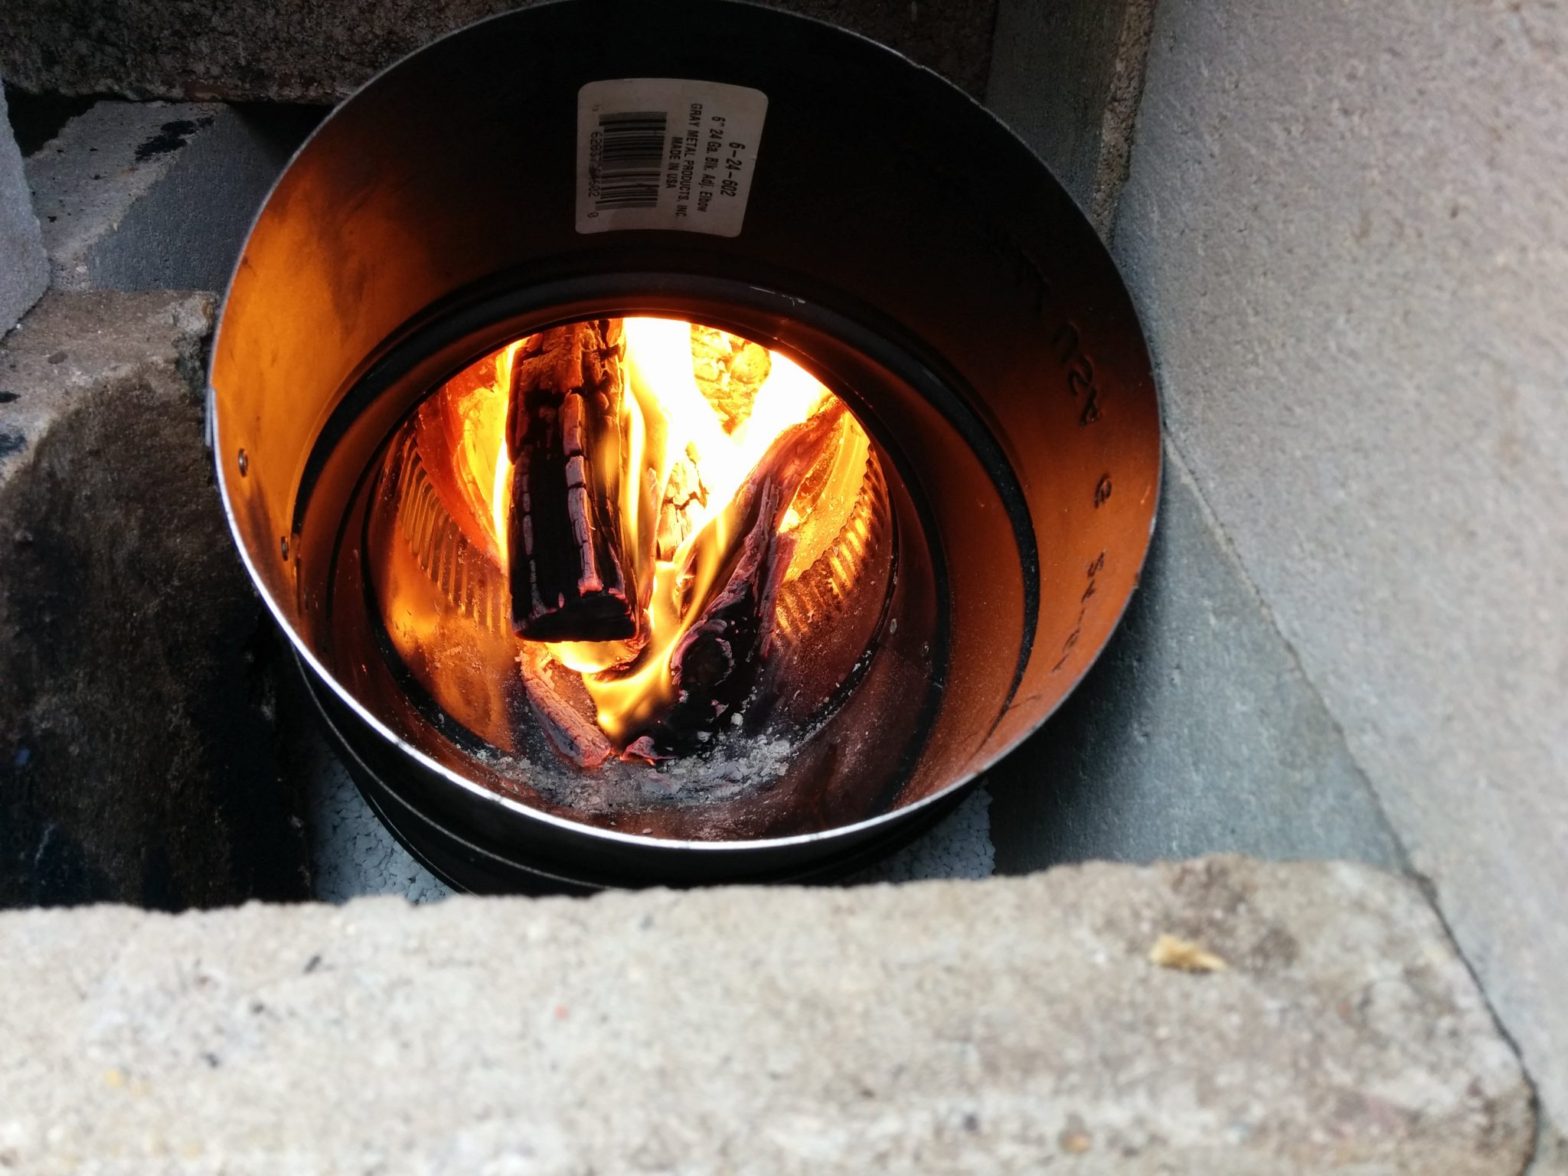
Now we have fire going in the stove. It will take a few minutes to warm up the combustion chamber and start really drawing the air in to get it to the point where it gets the roaring sound from which it gets the name rocket stove. While we are waiting, lets take a look at some of the design elements that I have built into this stove that gives it the ability to cook with indirect heat, but also a look forward into the many options that you can bring to this kind of project.
One of the things you will notice is that I talk about needing to insulate the chimney and combustion chamber. This is to help get the combustion chamber really hot without losing heat to the surrounding infrastructure. In the literature I have read, they often talk about using Perlite. I bought the only Perlite I could find, which was infused with Miracle Grow. I was a little leery about that, but this was a prototype so I bought one bag and gave it a try.
To test it, I threw some hot dogs on. It took a while, with hot dogs it might be better to use direct heat. But, it was successful.
I poured the Perlite down along the chimney and it settled to the bottom and down around the combustion chamber. Then I fired it up and let it get hot. I don’t know if it was my imagination, or if there was a strange smoky smell coming from where the Perlite met the chamber. I didn’t want to take a chance of getting that into what I was cooking, so I made some home made insulation. I took the ashes from my fire pit, and I sifted them to remove any debris. Then I packed the granulated ashes in around the bottom and top of the combustion chamber and chimney to seal off the Perlite and finish the insulation process. In the picture below you can see me adding the granulated ashes around the air and fuel intake portion of the stove. This effectively ended the problem with the smell/smoke coming from around the chimney.
In this image you can see the perlite surrounding the combustion chamber, and old ashes are being added to finish the process and seal off the perliteSifted / granulated ashes from fire pit used to fill in space around chimney as insulation.
With the stove now put together and properly insulated, it is time to put it to a real test. In the next post, I will go into how I configured the system to serve as both a grill and cooked using a rotisserie simultaneously. The imagination and how you will move the bricks to put heat on meat and vegetables is the only limit to how you can use the heat from this stove.
In this post I experiment with the chimney to see just how important it is to the rocket stove.
In this posting, I want to talk about the role of the combustion chamber and the chimney, because that is where all the real work gets done. The combustion chamber is of course where the burning happens, and the chimney is where the smoke and flames go as the air rushes through the system.
This is an experiment to see how adding a metal chimney affects the burning of the rocket stove.
It is important to understand at this point that a rocket stove works as efficiently as it does because it allows enough air to go through the system, and burns hot enough, to allow the fuel and the smoke to get burned in the combustion chamber. The chimney is an extension of the combustion chamber, and it is essential to the process because it gives the fire enough time to consume the energy released in the smoke by burning it. This process requires a very hot combustion chamber and chimney to be successful.
Here we experiment with the most basic rocket stove, the four brick stove.
Let’s start this out by saying that I did not have a budget for experimenting with rocket stoves. That doesn’t mean I had an unlimited budget, it means I had no budget. Most of what I do is done with bricks and cinder blocks (concrete blocks) I had around the house.
The most basic design can be built using 4 concrete blocks. It is a basic design that requires either an “H” block or, as I did, knock one end off of one of the blocks.
I have been experimenting with Rocket Stoves in an effort to build a rocket stove BBQ grill. Well actually, I want to use it for a bunch of different types of outdoor cooking. This post will be the first in a series of posts that walk you through my experimenting with the rocket stove.
A rocket stove is an efficient cooking stove using small diameter wood fuel which is burned in a simple high-temperature combustion chamber containing a vertical chimney, which ensures almost complete combustion prior to the flames reaching the cooking surface. Wikipedia
The core elements of the rocket stove are the fire chamber and the chimney.
My ultimate goal is to build a permanent installation with a rocket stove as the heat source, but with a number of different options for cooking. These options could include a BBQ grill, indirect heat grill, rotisserie, burner, and maybe even a pizza or bread oven. To do this, I am going to have to start small and build my personal knowledge. I have done a lot of research along the way, and looked at a lot of other people’s designs. If you are interested, the Design Principles at rocketstove.org is a good place to begin. I begin with a 4 brick stove that I will discuss in this article, and end up with a relatively flexible system that allows me to adjust bricks to customize the way I use the heat. Along the way, I will have a handful of articles where I will share what I have done and learned. I hope you enjoy.